
Why Hydroponics Rocks for Balcony Gardeners
Think hydroponics is complicated or expensive? Think again! It’s perfect for balcony constraints and beginner enthusiasm. Here’s why:
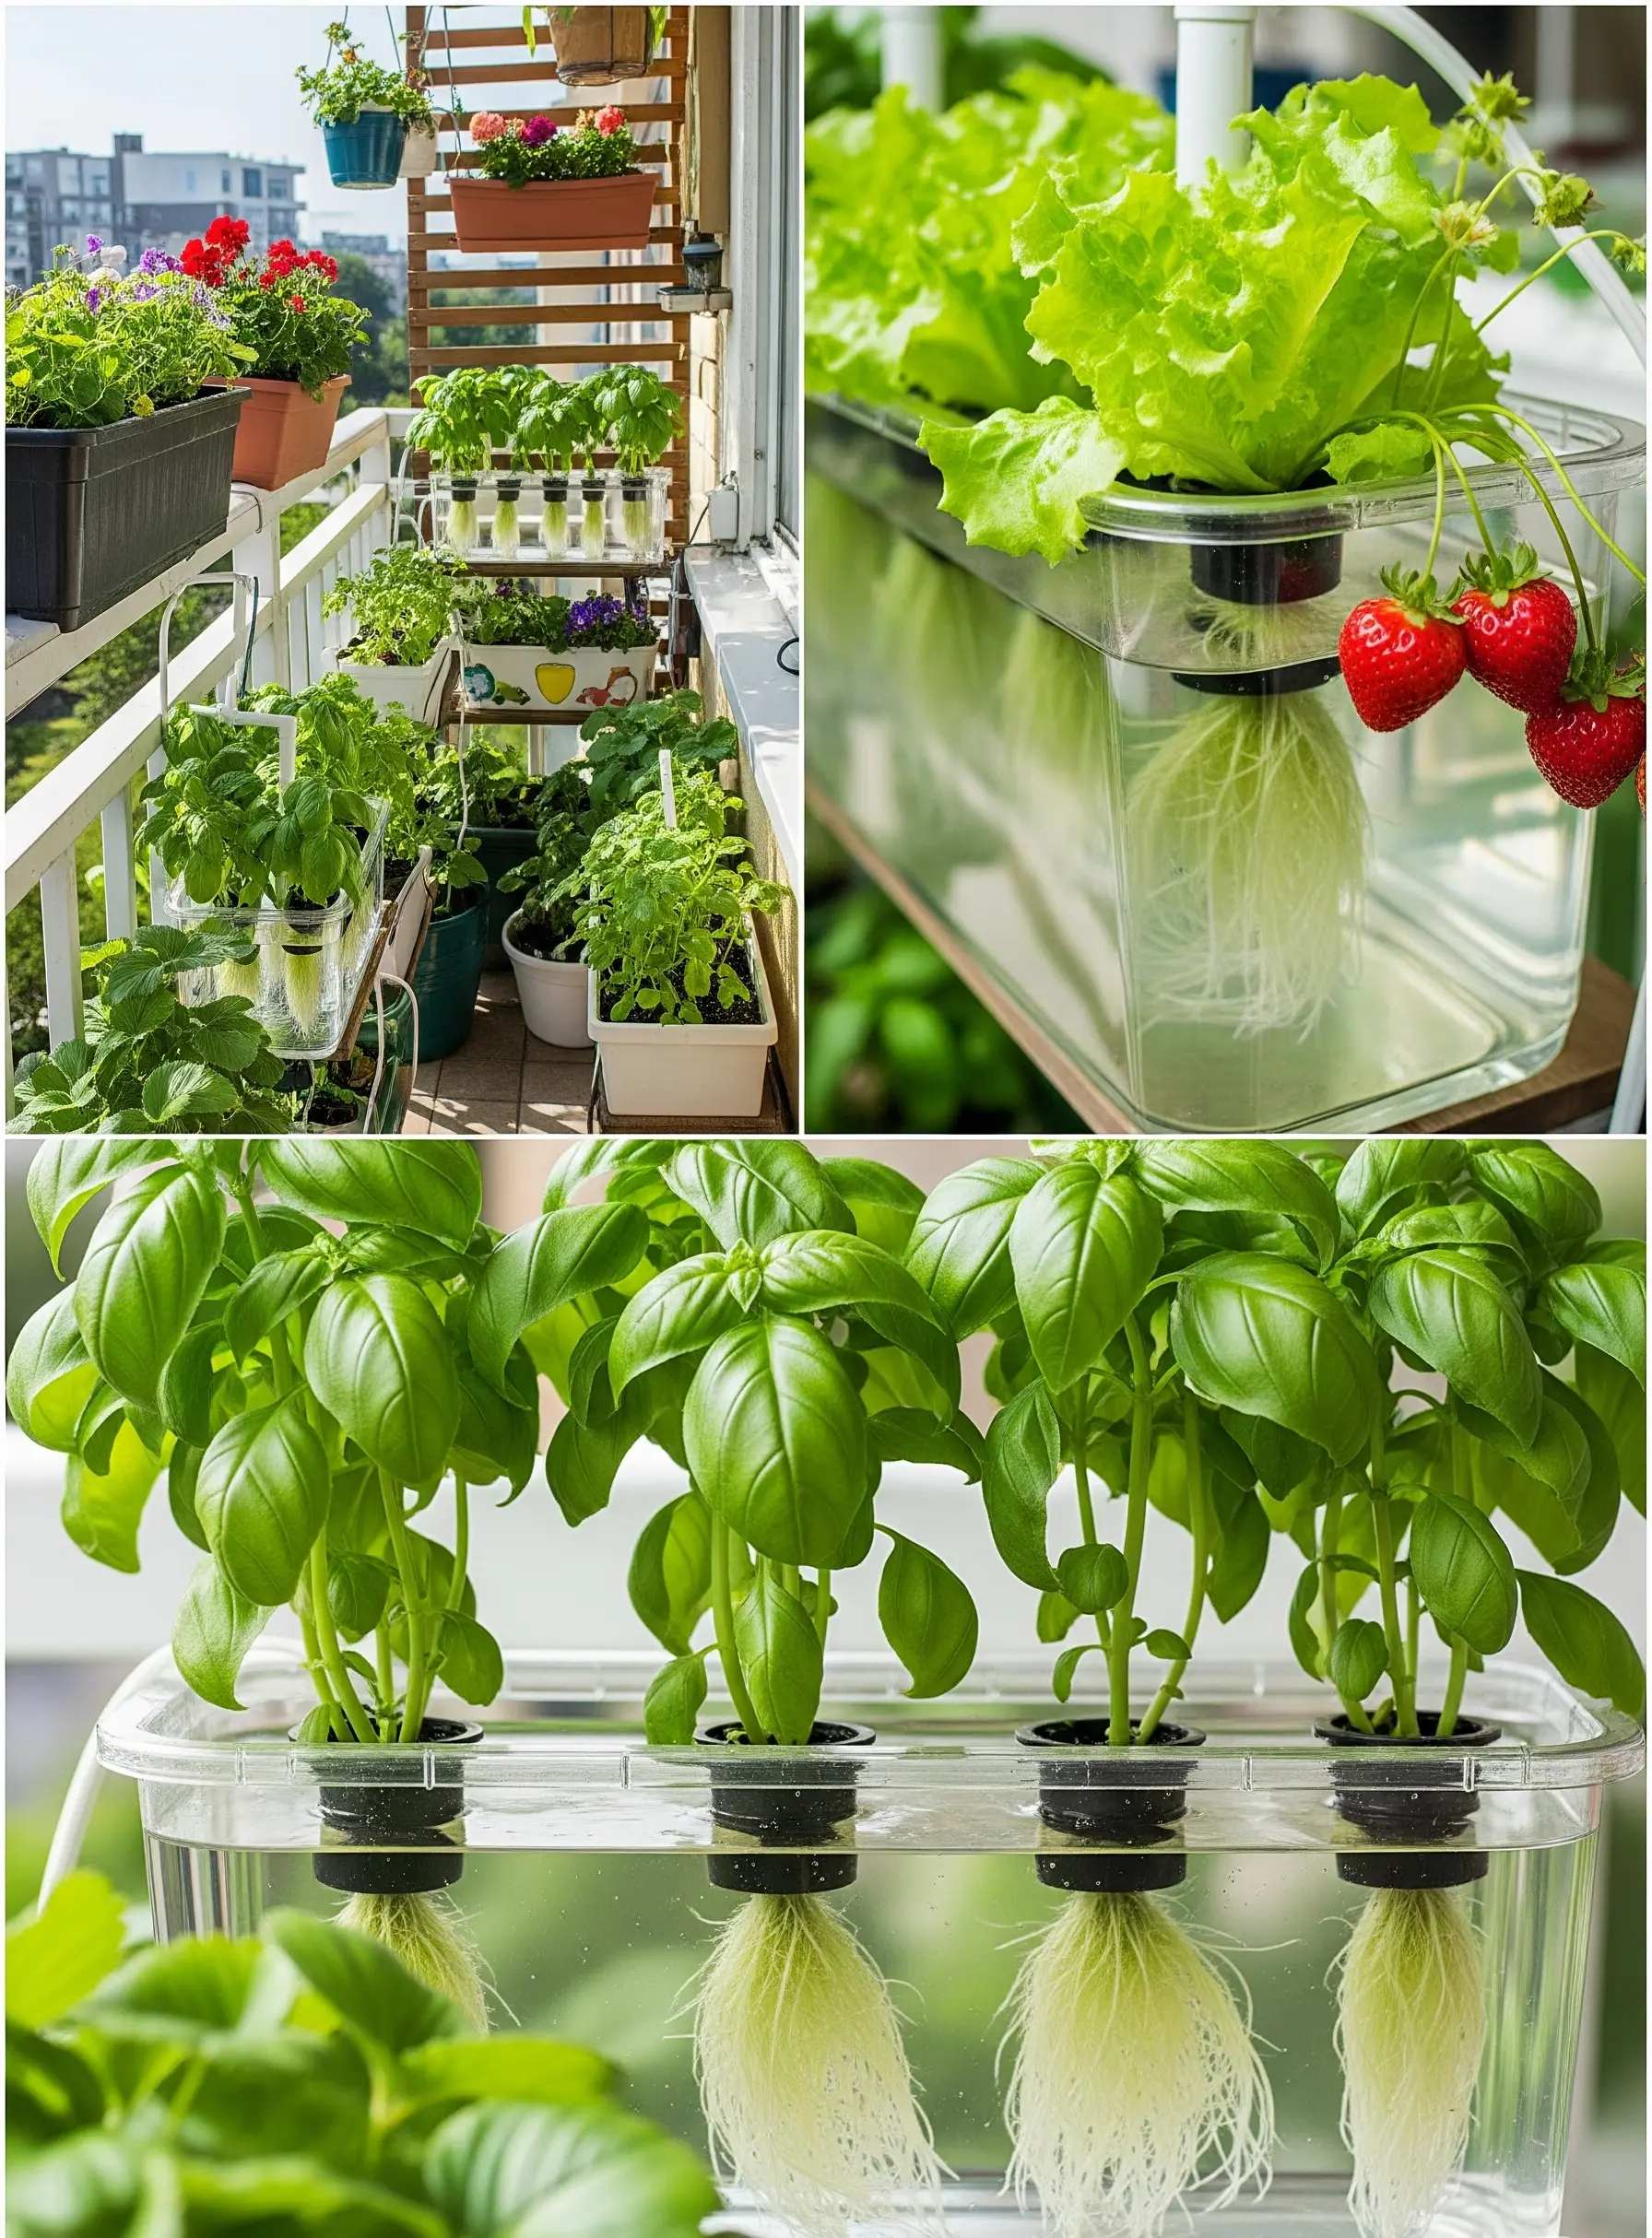
Space Superstars
Vertical stacking and compact systems maximize every inch. No sprawling garden beds needed!
Water Wisely
Uses up to 90% less water than soil gardening – a win for the planet and your water bill.
Speed & Simplicity
Plants grow 30-50% faster with instant access to nutrients. Less guesswork than soil!
Pest & Weed Patrol
Goodbye, back-breaking weeding! Soilless growing reduces soil-borne pests and diseases.
My balcony battles with aphids and slugs vanished when I switched to hydroponics. What used to be a constant fight became a peaceful oasis where I actually enjoy spending time tending to my plants rather than defending them!
Your Wallet’s Best Friend: Truly Low-Cost Hydroponic Systems Explained
Forget pricey kits! The true magic lies in DIY or simple, scalable systems. Let’s break down the most beginner-friendly and budget-conscious options:
1. The Kratky Method (Set It & Mostly Forget It)
The simplest passive hydroponics. Plants sit in net pots with roots partially submerged in nutrient solution within a light-proof container. No pumps, no electricity!
I started with lettuce in a $3 dark-colored storage bin. Within weeks, I had salad for days! Tip: Ensure the container is truly light-proof (paint it black or wrap it) to prevent algae.
2. Deep Water Culture (DWC) – Simple & Effective
Plants float on a raft or sit in net pots suspended over oxygenated nutrient solution. An aquarium air pump constantly bubbles air into the water.
My first cherry tomato plant in a 5-gallon bucket DWC outgrew anything I ever managed in soil! Crucial Tip: Check water levels daily in hot weather – plants drink fast!
3. Simple Wick Systems – Gentle & Passive
Uses a wick to draw nutrient solution from a reservoir up into the growing medium. Completely pump-free.
Great for keeping my kitchen herbs thriving on a sunny windowsill extension of my balcony. Watch Out: Wicks can clog over time; choose a porous substrate like perlite or coco coir.
What You’ll Learn in This Guide
System Comparison: Which Low-Cost Hydroponic Champion is Right for YOU?
| Feature | Kratky Method | Deep Water Culture (DWC) | Wick System |
|---|---|---|---|
| Cost | $$$ (Lowest) | $$ (Pump needed) | $ (Low) |
| Complexity | Very Simple | Simple | Very Simple |
| Electricity? | No | Yes (Air Pump) | No |
| Maintenance | Low (Refill only) | Medium (Check water/O2) | Low (Refill) |
| Best For | Leafy Greens, Herbs | Tomatoes, Peppers, Herbs | Small Herbs, Greens |
| Beginner Ease | ★★★★★ | ★★★★☆ | ★★★★★ |
Building Your First Balcony Hydroponic System: A Step-by-Step Guide
Let’s build a simple, scalable DWC bucket system – ideal for beginners wanting to grow larger plants!
What You’ll Need (Budget Shopping List)
- Container: 5-Gallon Food-Grade Bucket with Lid (Dark Color or Paint it Black)
- Net Pots: 3-4 inch size (One per bucket)
- Growing Medium: Hydroton clay pebbles (reusable!) or Perlite/Vermiculite mix
- Air Pump: Small aquarium air pump (for 1-2 buckets)
- Air Stone & Tubing: Standard aquarium kit
- Hydroponic Nutrients: Liquid concentrate specifically for hydroponics
- pH Testing Kit & Adjusters: Crucial! Liquid test kit or affordable digital pH meter
- Seedlings: Start your own in rockwool cubes or buy established seedlings
Start with easy wins like lettuce, basil, or kale! These forgiving plants will build your confidence before moving to more challenging varieties.
Assembly Steps (Easy Peasy!)
- Prep the Bucket: Ensure it’s clean. Drill a hole in the lid slightly smaller than your net pot rim, so it sits snugly.
- Set Up Aeration: Place the air stone at the bottom of the bucket. Connect tubing to the air stone and run it out the side or a small hole near the top.
- Plant Placement: Place your seedling (gently rinse soil from roots if needed) into the net pot. Surround the roots with your growing medium.
- Mix Nutrients: Fill the bucket with water (tap water is usually fine, let it sit 24h if chlorinated). Add hydroponic nutrients according to the bottle instructions.
- Check & Adjust pH: This is non-negotiable! Test the pH of your nutrient solution. Most plants thrive between 5.5 and 6.5.
- Assemble: Place the lid with the net pot onto the bucket. Ensure roots are touching the nutrient solution. Plug in the air pump.
- Find the Sun: Place your bucket in a spot on your balcony that gets at least 6 hours of sunlight daily.
I ignored pH adjustment in my first setup and had stunted plants for weeks! Don’t skip this crucial step – plants can’t absorb nutrients properly if pH is off.
Keeping Your Hydroponic Oasis Thriving: Simple Maintenance
Low-cost doesn’t mean no maintenance, but it is simple routine:
- Check Water Levels Daily: Especially in summer! Top up with pH-adjusted water when low.
- Monitor pH & Nutrients Weekly: Test pH and adjust as needed. Check nutrient strength weekly.
- Change the Reservoir: Every 1-2 weeks, completely empty, clean the bucket, and refill with fresh nutrient solution.
- Prune & Train: Keep plants tidy. Pinch basil tops for bushiness.
- Watch for Pests: Inspect leaves regularly. Blast pests off with water or use insecticidal soap.
Troubleshooting: Common Beginner’s Problem (And How to Fix Them!)
Don’t panic! Here are solutions to problems :
Realistic Timelines & Your First Harvest
Manage those expectations for maximum joy:
- Setup Day 1: Build system, plant seedlings, mix nutrients.
- Week 1: Focus on seedling adjustment. Monitor pH daily.
- Weeks 2-4: Watch for steady growth! Adjust nutrients as plants mature.
- Weeks 4-8: First harvests of leafy greens and herbs!
- Weeks 8-12+: Fruiting plants like tomatoes start producing.
Use the “cut-and-come-again” method for lettuce and herbs. Harvest only the outer leaves and let the center continue growing. My single lettuce plant provided salads for 3 months!
Beyond the Basics: Growing Your Balcony Farm
Start simple, then expand:
- Scale Up: Add more buckets! Try different systems side-by-side.
- New Plants: Try strawberries, dwarf beans, or chilies!
- Automate (A Little): A simple timer for lights or float valve for auto-topping up water.
Join the Community! You’re Not Alone.
Gardening is better together:
Active community of hydroponic gardeners sharing tips and troubleshooting
Dedicated space for balcony and small-space gardening enthusiasts
Inspiration from balcony gardeners around the world
Your Estimated Monthly Cost Breakdown (Realistic & Low!)
| Item | Initial Cost | Ongoing Monthly Cost | Notes |
|---|---|---|---|
| Bucket/Container | $5-$10 | $0 (Reusable) | One-time purchase per plant site |
| Net Pots (3-4″) | $0.50-$2 | $0 (Reusable) | One-time purchase per plant |
| Clay Pebbles | $10-$15 | $0 (Reusable) | Buy bulk, lasts many cycles |
| Air Pump & Stone | $15-$25 | Minimal Electricity | Runs continuously |
| Hydroponic Nutrients | $15-$25 | $5-$15 | Concentrate lasts many gallons/month |
| pH Test Kit/Adjusters | $15-$30 | $1-$5 | Kit lasts months, adjusters used slowly |
| Seeds/Seedlings | $3-$10 | Varies | Ongoing cost per planting cycle |
| Water | Minimal | Minimal | Hydroponics uses significantly less! |
| TOTAL (Startup) | ~$60-$120 for 1-3 plants/systems (Scalable!) | ||
| TOTAL (Monthly) | $5 – $25 (Primarily nutrients & seedlings) | ||
Ready to Transform Your Balcony?
Low-cost hydroponics isn’t just possible; it’s incredibly rewarding and accessible for beginners. Start your journey today!
Download Supply Checklist Join Our Community